Saturday, December 12, 2015

DIY pine cone wreath

The best crafts are made with what at least one item that you already have. This wreath was made with the pine cones from our yard and a store bought wreath form. You can wither use a plain metal one, but I was digging this white one, so I bought it instead.


Ingredients:
  • pine cones
  • metal wreath form
  • florist wire
  • latex gloves (optional, this helps to keep the sap off of your fingers)
Directions:

  • Start by winding an end of a piece of wire around the frame.


  • Or you can also start by winding the wire around the cone and then twist the end of the wire around the frame. Do whatever works easiest for you.

  • Place the pine cones where they looks best. 
  • Wrap the wire around each and then around the back of the wire frame until it is snug.
  • I worked with wire pieces that were approx. 18" long and you can wrap it around the cones multiple times (twice is good, one at each end, or one in the middle if it's small).
  • End the piece of wire by wrapping it around the wire wreath form a couple of times so that it is snug.
  • Continue to work your way around the wreath form until it's covered.

And there you have it, a beautiful wreath. You can also add berries for a pop of color.


Thursday, December 10, 2015

happy holidays

I think it should be acceptable to have Christmas lights in your home year round. There I said it. They add a magical sparkle, which is just what you need during the winter months. Although this year has been so warm that it doesn't even fee like winter.

Anyway, here are some pictures of our home decorated for the holidays.


We separated the sectional (which was my great aunt's and we had recovered by chairloom), and this spot by the fireplace has become Winnie Cooper's favorite spot. I just realized that she hasn't' had enough air time on this blog, so look forward to more dog pictures soon.


I am a fan of colored light. I know there are some snobs out there who think you should only use white, but mix it up and use the colors.


I made theses yarn trees at craft night and intended to write a blog post on how to make them. But the pictures I took are horrible, so just here's the brief summary:

Ingredients:
  • Yarn (I used 3 colors of yarn, each with a sparkly bit) to make 3 trees
  • Styrofoam cone(s)
  • scotch tape
  • hot glue gun
  • pom poms
  • small bells

Instructions:
  • You can use some scotch tape to tape and start the beginning of the yarn.
  • Keep winding it around the cone until it fills the whole space.
  • It helps to add a dab of glue here and there to keep yarn in place.
  • Around the top, add a dab of glue and place a pom pom. the ones I found had a bit of gold sparkle.
  • You can either tape or glue the end a the bottom of the cone.
  • Take another string of yarn and string on the bells. I had to use an upholstery needle (one with a big eye) to get the yard through the small bells.
  • Use a dab of glue or tape to end the string of bells, or wrap it down around again to the bottom to tape.

And voila, you have a DIY Christmas tree.


Tuesday, December 8, 2015

craft night!

I've been slacking on the craft nights lately, but this weekend I had my wonderful gal friends over for some good old fashioned crafting and eating pizza. Make it easy on yourself and just order take out and have  a couple apps to nibble one. A couple of cheeses and crackers are a great appetizer.


My friend Jenn made this "reef." She came prepared with some store bought greenery which she gave up on. I couldn't let a friend fail, so we went foraging in the yard for the holly and used some of the leftover bottom-of-the-Christmas-tree-braches to make a cool off-center wreath.

Thursday, November 19, 2015

your fall table-milk glass

Previously I posted some inspiration for decorating your Thanksgiving table - aka tablescape - using brass and leaves. Today I am providing you with some inspiration using milk glass.

I have paired some milk glass pieces from my collection, and from the brand*eye home shop to create a unique scene. This is definitely not the typical orange and eath tone thanksgiving table. It is inspired by the purple vintage glasses, which happened to pair perfectly with the cut coleus from my garden. I used the vintage milk glass vases and filled them with coleus. This arrangement would work with any cut flower or mixture of flowers. You can find a post on cutting your coleus here-extending the lives of coleus.


Ingredients:

The milk glass candle holders are from my collection, but if you're interested, just contact me at brandeyehome ( at ) gmail (dot) com.


I didn't use any base for this arrangement, but this would look even better with the scattering of leaves down the center like the brass example.


Monday, November 16, 2015

your fall table - leaves and brass

I don't know about you, but I love to create, enjoy and just appreciate a beautiful and delicious meal. If you're lucky enough to host Thanksgiving Dinner, here are some ideas to decorate your table. And I mainly say lucky, because I have a husband who does 90% of the cooking and is REALLY good at it. All I have to do is decorate and make a dessert or two.


Here is the first installment of a tablescape. That is the worst word, but a tiny part of me likes it. You can create any great "scape" really, with just a few great pieces and some imagination and creativity.

#a is the formal vintage setting with leaves and brass 


pillows, pillows, pillows

New to the brand*eye shop: pillows! This first collection is made with a vintage yellow fabric which has a great texture to it. A couple of them have been embellished with doilies to make them one of a kind. They are handmade for brand*eye by a lovely lady who lives in Ambler, PA. I met her about 12 years ago when she did the alterations to my wedding dress. Wow, I am getting old.

Monday, November 2, 2015

Marble, Turquoise and Brass

I recently found a bunch of great marble and brass pieces that are now in the brand*eye home shop.

This set of brass cranes looks identical to a set that my Grandpa had and I always loved.


This wooden Rhino is so cute, I really want to keep him. But he is available in the shop.


And the color of this ash tray is the absolute best. It's a vintage Royal Haeger ceramic piece.


This set of Marble candle holders is gorgeous. They are not a matching set, but I am a fan of things matching, without being matchy matchy. Ya feel me?

Thursday, October 22, 2015

house plants

over the years I have figured out the kinds of things that can take a nice space and make it an awesome space. #1 on that list is house plants. this plant I picked up, along with 2 more who need to find a home in my house, at a yard sale for $2. two dollars! and the lady who was selling them was super sweet and I told her that I would try my best to keep them alive. so I am trying.

this is the before and after of our bathroom. pre and post plant. it fills up that weird angle perfectly.

if  I had planned this photo shoot better a) it would have been day time and the lighting would have been better and b) those vases would be filled with flowers.

Monday, October 19, 2015

vintage planters in the brand*eye home shop


Saturday I was a very lucky girl and scored a lot of great things to stock the brand*eye home shop. I found lots and lots of excellent planters. The yellow one above is my favorite. These work really great to store things around your home. I use them for bracelets, keys and misc items.

Tuesday, October 13, 2015

Extending the Lives of Coleus

I always look forward to the beginning of Autumn and the crisp chill in the air. But the part of fall that I enjoy least is that most of the outdoor plants die for the season. What if I could tell you that this doesn't have to happen. (Writing that sounds like I am in an infomercial.) But it's true. There are a few plants that you can take clippings from and overwinter inside your home. This means that you will have to buy less next spring and having them inside your home will cheer you up all winter. WIN WIN!


Tuesday, September 22, 2015

new (old) brand*eye home items

I have slowly been stocking up the new and improved brand*eye etsy shop. Here are a couple of new pieces.


This vintage Hull planter works great store anything. It worked especially well to hold make-up brushes.  


This is a super cute planter that would work for storage. And of course as all planters do, would work as a planter. :-)

 
And this basket is super rad. It looks teeny tiny in this pic, because this plant is huge. It is on the smaller side, but has a hook for hanging and would look divine mixed with some other art work and objects.


This vintage wall hanging is my favorite. It is a linen screen printed panel of the Chrysler Building in NYC. I contemplated keeping it, but I am already keeping the only other very cool thing that I found that day (a brass vintage star burst planter).


Thursday, September 17, 2015

winnie cooper

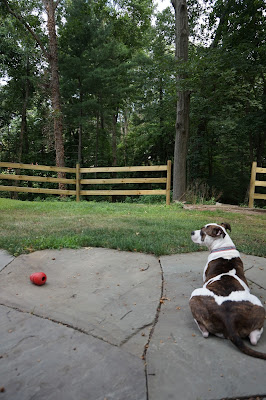
So remember when I told you that we started fostering? Well we have already failed at that and this little lady is now our winnie cooper


She was found last summer as a stray with her puppies. All of her puppies were adopted last year and she had been waiting for her home. It's now with us.


She is my #1 cuddler and we love her so much.

Wednesday, September 2, 2015

re-opened brand*eye esty shop

I have been thinking about re-opening the brand*eye etsy shop for some time now and finally decided to just do it. I have some big plans for it, but am starting small and with just some vintage that I have found over the years. Look for more vintage awesomeness to be added soon!!

Friday, August 28, 2015

the first apartment

There is nothing quite like your first apartment. It's the beginning of something great, which is your life, and is exciting, and scary and, most importantly, fun! I had the awesome opportunity to drive with my niece to the beginning of her new adventure. She now lives in the super cool state of Colo-RAD-o.

Believe it or not, my niece already had all of this sweet art work and the bedspread (duvet cover for the fancy folks). All we had to buy were some necessities like a bed, and dresser and night stand, etc.
 

The artwork is from Hailey's collection (we just had to buy some frames) and the bedspread is from Deny Designs, which is a great website to find unique artist designed home furnishings.
"kids these days" have a great thing called tapestries. In my day we had a thing call "posters" which were very easily bent and ruined. I still may or may not have many, framed, bent posters in my home. Also, if they are lucky, have talented roommates, who are artists, and make very cool paintings of libraries. This is the living room of the house she lives in. 
 
I have to admire the gigantic closet in her bedroom. My first apartment had a small closet, which was shared, and my second closet in my second apartment/house had the smallest closet. It could not even fit a hanger hanging perpendicular to the wall.

Monday, August 10, 2015

Mirror Art Wall

I am a fan of using random art work and items to fill a wall space. If you went to the Barnes they would call it an "ensemble." We are trying to finish the dining room on the smallest budget possible so we used what we had lying around. Admittedly I have more just "lying around" than most, but it's due to lots of hard work and picking through flea markets, yard sales and thrift stores.  ;-)


go outside

Last week we spent a few days in the Poconos with friends. We were looking for a place to hike with waterfalls nearby and landed at this place after a google search and a couple of tries with phone based maps.

Glen Onoko Falls


It starts with a graffiti covered bridge.

Friday, July 3, 2015

Dining Room Wallpaper

Remember the wallpaper that I talked about? It's installed! And it looks AMAZING!


Now what to do with the other side of the long, narrow dining room?

 
 Look how perfectly it matches Dave's Grandma Lucille's chair and bar.
 The wallpaper is from York Wallcoverings and is the Lotus paper. It is so gorgeous and bold. I love it!